The Aprilaire 700M is a large fan-powered humidifier designed for whole-home installation in ducts, compatible with various water types. This manual provides a comprehensive guide for installing the 700M, ensuring proper setup and optimal performance to improve indoor air quality and protect your home from dryness.
1.1 Overview of the Aprilaire 700M Humidifier
The Aprilaire 700M is a large fan-powered humidifier designed for whole-home use, compatible with ducted HVAC systems. It offers a water feed rate of 6 gallons per hour, supporting hot, cold, softened, or unsoftened water. The unit includes a manual control option, which can be mounted in a return duct or on a wall, ensuring flexible installation and ease of use for maintaining optimal humidity levels year-round.
1.2 Importance of Proper Installation
Proper installation of the Aprilaire 700M is crucial for optimal performance, efficiency, and safety. Incorrect installation can lead to issues such as inadequate humidity control, water damage, or system inefficiency. Following the installation manual ensures correct setup, prevents potential hazards, and maintains warranty validity; Proper installation also ensures reliable operation, protects your home from dry air damage, and provides consistent indoor air quality throughout the year.
System Requirements and Compatibility
The Aprilaire 700M is compatible with most HVAC systems, requiring a 24VAC transformer and suitable for hot, cold, or softened water supply. It can be installed on the supply plenum or cold air return duct, ensuring flexibility in setup and operation.
2.1 Compatible HVAC Systems
The Aprilaire 700M is designed to work seamlessly with most forced-air HVAC systems, including gas furnaces, heat pumps, and central air conditioning units. It can be integrated with both single-stage and multi-stage systems, ensuring efficient operation. Compatibility extends to various duct configurations, making it a versatile solution for maintaining optimal humidity levels in different home setups. Proper installation ensures the humidifier operates in harmony with existing HVAC equipment.
2.2 Space and Placement Considerations
The Aprilaire 700M can be installed on either the supply plenum or the cold air return duct. Ensure adequate space for serviceability and proper airflow. Maintain clearances as specified in the manual to avoid obstructing air circulation. Avoid installing near furnace jackets or areas where cooling coil ends may restrict air flow. Proper placement ensures efficient operation and prevents potential issues with humidity distribution.

Safety Instructions and Precautions
Disconnect electrical power to the furnace before installation to avoid shock. Follow all safety guidelines in the manual to ensure proper and risk-free installation of the Aprilaire 700M.
3.1 Electrical Safety Measures
- Disconnect electrical power to the furnace before starting installation to prevent shock hazards.
- Use a 24V transformer with a minimum of 10VA to ensure safe and stable power supply;
- Avoid incorrect wiring connections to prevent electrical malfunctions or damage.
- Follow all electrical safety guidelines outlined in the manual for a secure installation process.
3.2 Water Supply and Drainage Requirements
- The Aprilaire 700M requires a dedicated water supply line with a saddle valve for connection.
- A drain line must be installed to prevent water overflow and ensure proper drainage.
- The system is compatible with cold, hot, softened, or unsoftened water.
- A water filter (if recommended) should be installed to protect the solenoid valve.
- Ensure all connections comply with local plumbing codes and standards.
- Regularly inspect and maintain the water supply and drainage systems for optimal performance.

Pre-Installation Steps
Before installation, review the Aprilaire 700M manual, gather required tools, and ensure compatibility with your HVAC system. Understand the installation template and plan the layout.
4.1 Tools and Materials Needed
The Aprilaire 700M installation requires specific tools and materials, including a drill, screwdriver, pliers, wrench, and tubing cutter. Materials needed are the installation template, mounting screws, saddle valve, water tubing, and drain hose. Ensure all components from the box are available, such as the humidifier, bypass damper, and transformer. Refer to the manual for a detailed list to ensure proper installation and functionality of the system.
4.2 Understanding the Installation Template
The installation template is a critical tool provided with the Aprilaire 700M to ensure accurate placement and alignment during setup. It outlines the exact dimensions and mounting points for the humidifier and bypass damper, ensuring proper fitment within your HVAC system. By following the template, you can avoid installation errors and ensure all components are correctly positioned for optimal performance and efficiency. Take time to study the template before starting the installation process to simplify the task and minimize potential mistakes.
Installation Process
The Aprilaire 700M installation involves mounting the humidifier, connecting water supply and drain lines, and wiring the control. Follow the manual for step-by-step guidance to ensure proper setup and functionality.
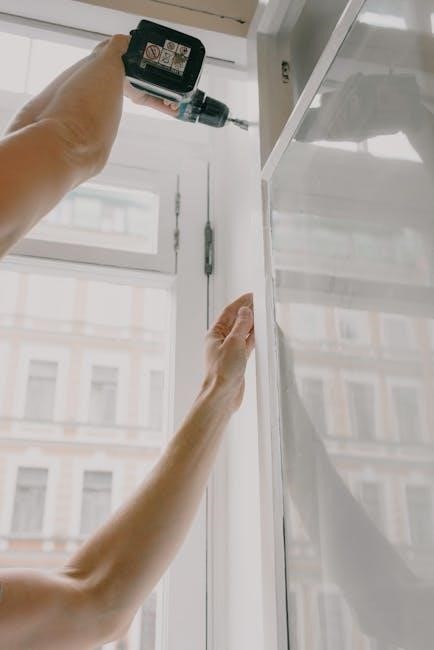
5.1 Mounting the Humidifier
Mount the Aprilaire 700M on a wall or in the return duct, ensuring proper alignment with cooling coils. Use the provided template to drill holes accurately. Secure the humidifier firmly to support its weight and ensure stable operation. Ensure the unit is level and accessible for future maintenance. Follow the installation template and manual instructions carefully for correct placement and installation.
5.2 Connecting Water Supply and Drain
Connect the water supply line to the humidifier’s solenoid valve, ensuring proper threading and sealing. Install the drain line according to the provided kit instructions, ensuring it slopes downward to prevent water stagnation. Connect the drain to a nearby floor drain or condensate pump. Check all connections for leaks and ensure the water supply is turned on before testing the system. Follow the manual for specific fitting requirements and safety guidelines.
5.3 Wiring the Humidifier
Connect the humidistat to the 24VAC transformer, ensuring proper wiring according to the provided diagrams. Wire the solenoid valve and fan to the humidistat terminals, following the manual’s specific instructions. Verify all connections are secure and meet local electrical codes. Turn on the power and test the system to ensure correct operation. Refer to the wiring diagram in the manual for detailed connections and safety precautions to avoid electrical hazards.
Setup and Configuration
Configure the humidistat by selecting automatic or manual mode. Set desired humidity levels and ensure proper system operation. Refer to the manual for detailed setup instructions.
6.1 Programming the Humidistat
Program the humidistat by selecting either automatic or manual mode. In automatic mode, the system adjusts humidity based on outdoor temperature. Manual mode allows setting a fixed humidity level. Ensure the humidistat is properly connected to the HVAC system and configured according to the installation manual for optimal performance and energy efficiency.
6.2 Testing the System
After installation, test the system by turning the humidistat to the TEST position. Ensure water flows through the humidifier and the system operates with the HVAC fan. Verify proper function by checking humidity levels and water drainage. Address any issues promptly to ensure efficient operation and prevent damage. Confirm the system is ready for regular use by verifying all components work together seamlessly.
Maintenance and Upkeep
Regular maintenance ensures optimal performance. Clean the water panel, check drainage, and service annually. Replace parts as needed and follow manufacturer guidelines for longevity.
7.1 Cleaning and Replacing Parts
Regularly clean the water panel and drain to prevent mineral buildup. Replace the water panel annually or as needed. Inspect and clean the solenoid valve and humidifier fan. Ensure proper drainage to avoid water damage. Refer to the manual for specific replacement guidelines and maintenance schedules to keep the system efficient and functional.
7.2 Seasonal Shutdown and Startup
For seasonal shutdown, turn off the water supply and drain the system to prevent freezing. Clean the humidifier and dry components thoroughly. Upon startup, inspect all parts for damage or wear. Replace the water panel and ensure proper connections. Follow the manual’s guidelines to reactivate the system, ensuring optimal performance and preventing issues after periods of inactivity.
Troubleshooting Common Issues
Identify and resolve common problems like no water flow or excessive humidity by checking water supply, drainage, and humidistat settings. Ensure proper system operation and adjust as needed for optimal performance.
8.1 No Water Flow
No water flow in the Aprilaire 700M can occur due to issues like closed water supply valves, faulty solenoid valves, or improper wiring connections. Check the water supply line for kinks or blockages and ensure the saddle valve is fully open. Verify the solenoid valve is functioning correctly and receiving 24VAC power. Consult the wiring diagram to ensure all connections are secure and properly configured. If issues persist, replace the solenoid valve or check for water pressure problems.
8.2 Excessive Humidity
Excessive humidity with the Aprilaire 700M may result from improper humidistat settings or drain line blockages. Ensure the humidistat is correctly calibrated and the drain line is clear. Verify that the water supply is not overactive and the bypass damper is properly adjusted. If issues persist, inspect the wiring connections and consult the wiring diagram to ensure correct operation. Adjust the humidistat settings or replace it if necessary to maintain balanced humidity levels.
The Aprilaire 700M installation is now successfully completed. Ensure all final checks are performed to verify proper operation. Refer to the warranty for future support and maintenance.
9.1 Final Checks and Verification
After installation, perform final checks to ensure the Aprilaire 700M operates correctly. Verify water flow, drainage, and humidistat functionality. Test the system by running the furnace blower to confirm humidity levels are regulated properly. Check for leaks and ensure all electrical connections are secure. Refer to the manual for specific verification steps to ensure optimal performance and safety.
9.2 Warranty and Support Information
The Aprilaire 700M is backed by a comprehensive warranty covering parts and labor for a specified period. Ensure proper installation by a qualified technician to maintain warranty validity. For detailed warranty terms and conditions, refer to the official Aprilaire manual or contact their customer support. Additional resources, including troubleshooting guides, are available online to assist with any inquiries or concerns about your humidifier.

Aprilaire 700M Manual Control Wiring
Understand the wiring requirements for the Aprilaire 700M manual control. Refer to the provided diagrams and instructions for proper connections to ensure safe and effective operation.
10.1 Wiring Diagrams and Connections
Refer to the Aprilaire 700M manual for detailed wiring diagrams. Connect the manual control to the humidistat, ensuring proper links to the transformer and furnace terminals. Follow the recommended wiring layout to avoid electrical hazards. Secure all connections tightly and verify polarity to prevent damage. If unsure, consult a licensed electrician for safe installation. Proper wiring ensures optimal performance and safety of the humidifier system.